Pages

Friday, September 30, 2011

Paper Players #65 - Piece of Poision

Card Front


I decided to use the sketch #65 from The Paper Players Challenge for this Halloween Card.  I have two teenage boys and thought this card would be prefect for my oldest.  The stamp set is from the Holiday Mini, Piece of Poison.  I know that this Stamp Set, may be a little too creepy for some, but I find it prefect for those creepy Halloween Projects. 

I also used the "Pick your Poison Designer Series Paper" from the Holiday Mini that coordinates perfectly with the stamp set I used. I am loving the classic Halloween Colors; Basic Black, Pumpkin Pie, Very Vanilla.  I felt that distressing was in order for this creepy card and of course some sponging with Black Ink and a little Soft Suede (I felt it gave it that nice vintage feel).     

Thanks for stopping by,
Karen

Inside of Card

Supplies - All products listed are Stampin' Up! unless otherwise posted.
Stamps: Piece of Poison (C#120754, pg 9, Holiday Mini), House of Haunts (#111574, pg 25),  
Punches/Dies: Lots of Tags Sizzlits Die Set (#114508, pg 224),  Extra-Large Oval Punch (#119859, pg 212) 

Paper: Pumpkin Pie (#105117, pg177), Very Vanilla (#101650, pg180), Basic Black (#121045, pg180)Pick Your Poison Designer Series Paper (#124001, pg10, Holiday Mini Catalog)
Ink: Basic Black Craft (#102192, pg180), Soft Suede Ink (#115657, pg180)

Ribbon: Basic Black 1/4" Grosgrain Ribbon (#109027, pg 195), Pumpkin Pie 1/4" Grosgrain Ribbon (#109030, pg 195)

Accessories: Champagne Shimmer Paint (#116806, pg 203), Black Brads - Neutrals (#119736, pg 199), Clear Embossing Powder (#109130, pg 201)

Adhesive: SNAILAdhesive (#104332, pg 206), Stampin Dimensionals (#104430, pg 206)


Monday, September 26, 2011

PPA112 & SSC222 - Halloween Lace Card


I was inspired with making today's card using the Challenge from Pals Paper Arts Blog - PPA112-CAS Element of Style - Lace.  I knew I wanted to make a Halloween Card and wanted black lace. When I saw the Saturday Sketch Challenge #222 from Stamping 411 on Saturday Morning, it was calling for me to use it with the Hello, Doily Stamp Set and the little kids witch from the "Greeting Card Kids Stamp Set.  I hope it is ok that I combined challenges this week.   

The color combo for this card is Black, Pumpkin Pie, and Very Vanilla, which are the color combos of the new Pick your Poison Designer Series Paper from the Holiday Mini Catalog.  I love the soft vintage feel of this paper.  

Don't forget to look at the inside of the card below.  I couldn't help myself with adding some more black lace to the inside of the card with the Doily Stamp and the Eyelet Border Punch. 

This weekend I did not get to make as many Halloween Projects and cards that I wanted to for the blog.  I will get started this week and hope to start posting those soon. 

I hope you like the card and are insprised to pull out some stamps and get stamping.

Thanks for stopping by,
Karen
Supplies - All products listed are Stampin' Up! unless otherwise posted.
Stamps: Greeting Card Kids (C#120633, pg 34), Hello, Doily (#122845, pg 150),  Wicked Cool (C#120600, pg 24), Piece of Poison (C#123754, pg 9, Holiday Mini Catalog)

Punches/Dies: Doily Triple Layer Punch (#122465, pg211), 1" Circle Punch (#119868, pg 212), Eyelet Border Punch (#119853, pg 211), 2-1/2" Circle Punch (#120906, pg 212), Perfect Pennants Bigz L Die (#123126, pg 221),

Paper: Pumpkin Pie (#105117, pg177), Watercolor Paper (#122959, pg 181), Very Vanilla (#101650, pg180), Basic Black (#121045, pg180)Pick Your Poison Designer Series Paper (#124001, pg10, Holiday Mini Catalog)

Ink: Basic Black Craft (#102192, pg180), Basic Black Marker (#100082, pg 180), Pumpkin Pie Marker (#105115, pg 177), Old Olive Marker (#100079, pg 177), Early Espresso Marker (#119680, pg 180), Tangerine Tango Marker (#120974, pg177), StazOn Jet Black Ink Pad (#101406, pg 203)

Ribbon: Basic Black Satin Ribbon (#117285, pg 195), Basic Black 1/4" Grosgrain Ribbon (#109027, pg 195)

Accessories: Champagne Shimmer Paint (#116806, pg 203), Black Brads - Neutrals (#119736, pg 199), Clear Embossing Powder (#109130, pg 201)

Adhesive: SNAILAdhesive (#104332, pg 206), Stampin Dimensionals (#104430, pg 206)

Friday, September 23, 2011

Try it on Tuesday #33 - Forever Young

The other day I ran across this Blog - Try Stampin' on Tuesday.  They have some great sketches, so if you like sketches, than you should add this blog to your blog list.  I used this week's sketch #33 (below) and decided to use it to create the card above. 

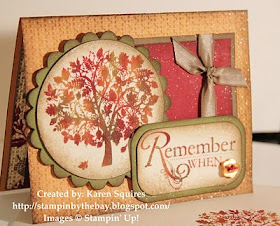
I wanted to break out the Forever Young Stamp Set from the Idea Book & Catalog.  I just love the image of that big tree with the girl on the swing.  The color combo is Cherry Cobbler, Early Espresso, Daffodil Delight.

I first cut out a Naturals White 3-1/2" circle with the Originals Die.  I lightly sponged the circle with the color combos (starting on the bottom) of Daffodil Delight, Baja Breeze and Night of Navy (sponge in a lightly circular pattern).  I finished the circle by light sponging the edge with the Soft Suede Ink.  Using my Early Espresso and Cherry Cobbler Marker, I color the image of the stamp.  After stamping the image, I realized the image was not a dark as I wanted it.  So I used my markers to color in the image some more.  After the I happy with the results, I spritzer the circle with the Frost White Homemade Shimmer Mist.   

Next I worked on the Cherry Cobbler card base.  I inked up my Fancy Fan Letterpress Plate with Early Espresso Craft ink (I just inked an area the size of my card piece).  Next, I ran my piece of Cherry Cobbler - 4" x 5-1/4" through the big shot with the inked letter press.  I attached this piece to my Card Base.  My 2" x 4-1/2" piece of Early Espresso was ran through the big shot with the Square Lattice Textured Embossing Folder.  I used my Lace Ribbon Border Punch to a punch a border of Daffodil Delight.  I wove my Cherry Cobbler 1/2" Seam Binding Ribbon through the lace border and attached a bow with an Antique Brad.  

Hope you like the card and I hae inspired you to get stamping.  :o)  Leave a comment and let me know what you think. 

Next week I am going to try to do a week worth of Halloween Cards & Projects, so make sure you come back. 

Thanks for stopping by,
Karen

Supplies - All products listed are Stampin' Up! unless otherwise posted. 

Stamps: Forever Young (C#122572, pg 79), Teeny Tiny Wishes (#115370, pg 157)

Punches/Dies: Word Window Punch (#119857, pg209), Modern Label Punch (#119849, pg 209), Lace Ribbon Border Punch (#122362, pg 211), 3-1/2" Circle Original Die (#121811, pg 220), Fancy Fan Letterpress Plates (#123129, pg 217), Square Lattice Textured Impressions Embossing Folder (#119976, pg 218)

Paper: Naturals White (#102316, pg 181), Cherry Cobbler (#119685, pg179), Daffodil Delight (#119683, pg177), Early Espresso (#119686, pg 180),

Ink: Cherry Cobbler (#119669, pg179), Cherry Cobbler Marker (#119681, pg179), Early Espresso Marker (#119680, pg 180), Early Espresso Craft Re-Inker (#121606, pg 180), Un-Inked Craft Ink Pad (#122265, pg 202)

Ribbon: Chery Cobbler 1/2” Seam Binding Ribbon (#120992, pg 195),

Accessories: Frost White Shimmer Paint (#116854, pg 203), Antique Brads (#117273, pg 198)

Adhesive: SNAILAdhesive (#104332, pg 206), Stampin Dimensionals (#104430, pg 206)

Wednesday, September 21, 2011

SSC221 Vintage Gift Givers Girl


I finally finished a card for the Stamping 411 Sketches on the same week so I can provide a link.  Yeah!  Above is the card I made from the Saturday Sketch Challenge #221.   


This is my first Shaker Card; I had to use the Gift Givers Stamp Set from the Holiday Mini Catalog.  I just love the image of the little girl...I think it is snow.  I can't believe I am thinking of snow already.  The color combo of Pink Pirouette, Marina Mist, Soft Suede, and Naturals White. 

The card base is Natural White and with a layer of Pink Pirouette that was run through the Big Shot with the Snow Burst Textured Impressions Embossing Folder.  I picked the Marina Mist pattern from the Beau Chateau Designer Series Paper for the next layer, I think it gives it a nice vintage feel; I backed it with a layer of Soft Suede.  Oh course all these were sponged with Soft Suede Ink.  Before attaching the pieces I sprayed with the Homemade Shimmer Mist made with the Frost White Shimmer Paint.  To give the pieces a little extra shimmer, it is snow right? 

Have you not made a shaker card?  Not sure how?  Let me know by posting a comment and I will get some pictures done to show you.  I am still working on a tutorial on the Fabric Flowers headbands. 

Thanks for looking,
Karen 

Stamps: Gift Givers (C#123774, pg 39, Holiday Mini Catalog)

Punches/Dies: 2-3/8" Scallop Circle Punch (#118874, 210), 1-3/4" Circle Punch (#119850, pg 212), Snow Burst Textured Impressions Embossing Folder (#124096, pg 33 – Holiday Mini)

Paper: Naturals White (#102316, pg 181), Pink Pirouette (#111351, pg178), Soft Suede (#115318, 180), Beau Chateau (#122357, pg 184), Transparency

Ink: Soft Suede Classic Ink Pad (#115657, pg 180), Pink Pirouette Marker (#120969, pg 178), Soft Suede Marker (#120973, pg 180)

Ribbon: Soft Suede 3/8” Taffeta Ribbon (#122967, pg 195),

Accessories: Frost White Shimmer Paint (#116854, pg 203), Smooch Pearilized Accent Ink (#121084, pg203), Shaker Frames (#124155, pg 38, Holiday Mini), Mica Flakes (#124115, pg 21, Holiday Mini), uni-ball Signo White Gel Pen (#105021, pg 203)

Adhesive: SNAILAdhesive (#104332, pg 206), Stampin Dimensionals (#104430, pg 206)

Tuesday, September 20, 2011

Beautiful Season and Wreath


Here's a card I made using the "Beautiful Season" Stamp Set from the Idea Book & Catalog.  I love the image with the song bird, at least I think it is a song bird.  I was never really good with the names of birds, I just like to watch them. 

The color combo is Crumb Cake, Always Artichoke, Cherry Cobbler and Naturals Ivory. 

The scallop circle used for the wreath is from Perfect Pennants Bigz L Dies.  The holly leaves and berries is from the Stocking Accents Originals Die from the Holiday Mini, I just ran my Simply Scored Stylus through the middle of the leaves. 

What do you think?

Thanks for looking!
Karen

Stamps: Beautiful Season (#122682, pg 45)

Punches/Dies: Perfect Pennants Bigz L Die (#123126, pg 221), Circle #2 Originals Die (#114526, pg 220), Stocking Accents Originals Die (#124099, pg 24, Holiday Mini), Houndstooth Textured Impression Embossing Folder (#123134, pg 218), corner rounder

Ink: Cherry Cobbler Classic (#119669 pg 179), Always Artichoke Classic Ink (#105219, pg 179), Soft Suede Classic (#115657, pg 180), Sahara Sand Classic Ink (#105208, pg 180), Early Espresso Classic (#119670, pg 180), Crumb Cake Marker (#120967, pg 180)

Embellishments: Cherry Cobbler Seam Binding Ribbon (#120992, pg 195), Antique Brads (#117273, pg 198)

Accessories: Champagne Mist Shimmer Paint (#116806, pg 203), Dazzling Details (#124117, pg 41), Blender Pens (#102845, pg 203),

Tools: Simply Scored Scoring Tool (#122334, pg 7 Holiday Mini), Color Spritzer Tool (#107066, pg 203)

Adhesive: SNAILAdhesive (#104332, pg 206), Stampin Dimensionals (#104430, pg 206)

Monday, September 19, 2011

FMS2 - Another Merry & Type Redo


Here's a card that I made using the sketch below from Freshly Made Sketches.  I know it is not a Clean card...I really have a hard time with not sponging or spritzing, sorry.  I just loved the simple sketch to redo the Merry & Type Christmas Card that I made here using the Merry & Type Stamp Set.  I made this card into an easel card and used the same color scheme - Riding Hood Red, Lucky Limeade, Naturals Ivory, Crumb Cake and Chocolate Chip.  


So what do you think?  Which one do you like best? 

Thank you for looking,
Karen


STAMPS: Merry & Type (Wood #122550, Clear #122552; Winter Post (#111780, 31)
PAPER: Riding Hood Red (#111348), New In-Color Lucky Limeade (#122926), Naturals Ivory (#101849), Crumb Cake (#120953), and Chocolate Chip (#102128).

INK: Riding Hood Red Classic Ink (#111836), Soft Suede Classic Ink (#115657),

PUNCHES/DIES: Decorative Label Punch (#120907, pg 209), 3/16" Corner (#119871), 1-3/4" Scallop Circle (#119854, pg210), 1-3/8" Circle (#119860), Petals-a-Plenty Embossing Folder (#116824)

RIBBON: 3/8" Ruffled Ribbon in Lucky Limeade (#122977), Riding Hood Red 3/8" Taffeta Ribbon (#122988, pg 195)

ACCESSORIES: Champagne Mist Shimmer Paint (#116806, pg 203),

Adhesives: Stampin Dimensionals (#104430, pg 206), SNAIL Adhesive (#104332, pg 206),

Come to Bethlehem

Here's another Christmas Card that I made using the "Come to Bethlehem" Stamp set.  I was so happy that this stamp set made it into the Idea Book & Catalog this year.  I got the idea to use the Glass Stampin' Glitter Champagne as the sand from this beautiful card made by Lisa Foster.

Thanks for stopping by,
Karen

Stamps: “Come to Bethlehem” (C#120591, pg 42)

Punches/Dies: Decorative Label Punch (#120907, pg 209), Tasteful Trim Bigz XL Die (#120893, pg 221), Square Lattice Textured Impressions Embossing Folder (#119976, pg 218), corner rounder

Paper: Naturals Ivory (#101849, pg 181), Cherry Cobbler (#119685, pg 179), Crumb Cake (#120953), Soft Suede (#102128, pg 180),

Ink: Cherry Cobbler Classic (#119669 pg 179), Gold Stamp Pad (Retired), Soft Suede Classic Ink (#1115657, pg 180)

Ribbon: Cherry Cobbler Seam Binding Ribbon (#120992, pg 195), Antique Brads (#117273, pg 198)

Accessories: Champagne Mist Shimmer Paint (#116806, pg 203), Champagne Glass Stampin Glitter (#120997, pg 201),

Adhesives: Stampin Dimensionals (#104430, pg 206), SNAIL Adhesive (#104332, pg 206), Multipurpose Liquid Glue (#110755, pg 206)

Sunday, September 18, 2011

Acrylic Post-It Note Holder


This is Post-it-Note Holder I made for my daughter's teacher.  This was a gift with the Notepad Holder I showed a few weeks ago, remember before it got all crazy on the East Coast.  Anyway, I first saw this years ago on Dawn's Stampin Studio.   I forgot about these but this summer when I ran into one of my son's teachers (from three years ago).  She told me that she still uses the post-it-note holder that I made her (Wow).  Oh course she has to attach new post-it notes but she says it is one of her favorite gifts.  Which got me thinking...I need to make one my daughter's teacher one this year.  

I used the new Spice Cake Designer Series Paper in the Holiday mini catalog.  I love the paper patterns and color combo.  If you are looking for teacher or office staff gifts for the holidays, this would be great and easy.  Whenever I am in the dollar store I always pick up a few acrylic frames, so I have them on hand.  You can never find them when you need them. 

Punches: 1 3/4' Scallop Circle Punch (#119854, pg 210), Scallop Trim Border Punch (#118402, pg 211)

Embellishments: 3/8" Taffeta Ribbon - Soft Suede (#122967, pg 195), Antique Brads (#117273, pg 198)

Adhesives: Sticky Strip (#104294, pg 206)

Paper: Spice Cake Designer Series Paper (#124003, pg17, Holiday Mini)

Tools: Bone Folder (#102300, pg 207) 

Saturday, September 17, 2011

Leaves of a Tree and 20th Anniversary

This past Wednesday, my husband and I celebrated our 20th wedding anniversary. Here's a card I made for him. I can’t believe it has been 20 years but I would marry him all over again, love you honey.

I used the “Leaves of a Tree” A’ la Carte Stamp Set from the Holiday Mini as the main focal point of the card. The sentiments is from the Word Play Stamp Set. The color combo is More Mustard, Cherry Cobbler, Always Artichoke, Soft Suede and Naturals Ivory.

Remember the homemade Stamp Pad that I made the other day. Here is where I used the stamp pad to stamp the tree and sentiments. I also used some of the leftover pieces from the Day of Gratitude Notecard Bag for the inside of the card. September is a popular month for weddings in our house, my parents also celebrated their wedding anniversary on Monday, so the card below is my parent’s card, slightly different.

I used the Card Sketch 219 from Stampin 411, they always have great sketches. 


Parent's Card Above

Inside of Cards Above
Let me know what you think.

Thanks for stopping by!
Karen

Stamps: “Word Play” (C#120651, pg 156), "Leaves of a Tree” (#123843, pg 43, holiday mini), Day of Gratitude (C#121148, pg 28), Woodgrain Background Stamp (#117100, pg 151), Retired Hostess Stamp for “Happy Anniversary” sentiment

Punches/Dies: 3” Circle Originals Die (#122125, pg 221), Scallop Circle #2 Bigz Dies (#113469, pg 222), Square Lattice Embossing Folder (#119976, pg 218), Houndstooth Embossing Folder (#123134, pg 218)Paper: More Mustard (#100946, pg 179), Cherry Cobbler (#119685, pg 179), Always Artichoke (#105119, pg 179), Natural Ivory (#101849, pg 181), Soft Suede (#115318, pg 180)

Ink: Cherry Cobbler Classic Ink Refill (#119788 pg 179), More Mustard Classic Ink Refill (#101962, pg 179), Always Artichoke Classic Ink Refill (#105232, pg 179), Soft Suede Classic Ink Refill (#115663, pg 180), Soft Suede Classic Ink Pad (#115657, pg 180)

Embellishments: Soft Suede 3/8” Taffeta Ribbon (#122967, pg 195), Designer Buttons Regals (#119744, pg 197)Accessories: Champagne Mist Shimmer Paint (#116806, pg 203), Dazzling Details (#124117, pg 41, Holiday Mini)

Adhesives: Sticky Strip (#104294, pg 206), Stampin Dimensionals (#104430, pg 206), SNAIL Adhesive (#104332, pg 206

Friday, September 16, 2011

Welcome Christmas Children

Here's a card I made using the “Welcome Christmas” Stamp Set in the Idea Book & Catalog. What I love most of this set is the image of the children, I guess that is the kid in me, I love snow. The little snowflake image is from the “Snow Swirled” Stamp set and the Trees are from the “Lovely as a Tree” stamp set. The color combo is Baja Breeze, Not Quite Navy, and Naturals White.

The used the “Sweet Sunday Sketch Challenge 133” to make this card.

I sprayed my card pieces in the Homemade Shimmer Mist using the Frost White Shimmer Paint, directions can be found here.

Let me know what you think!

Thanks for looking,
Karen

Stamps: “Lovely As a Tree” (#115026, pg 114), "Snow Swirled” stamp set (#111690, pg 38), “Welcome Christmas” stamp set (C#120597, pg 36), Teeny Tiny Wishes (#115370, pg 157)

Punches/Dies: 3 1/2” Circle Original Die (#121811, pg 220), Tasteful Trim Bigz XL Die (#120893, pg 221), ½” Circle Punch (#119869, pg 212), Word Window Punch (#119857, pg 209), Modern Label Punch (#119849, pg 209), Snow Burst Textured Impressions Embossing Folder (#124096, pg 33 – Holiday Mini), corner rounder

Paper: Naturals White (#102316, pg 181), Baja Breeze Cardstock (#111352, pg 178), Not Quite Navy Cardstock (#101722, pg 179)

Ink: VersaMark Stamp Pad (#102283, pg203), So Saffron Classic Ink (#105213, pg178), Baja Breeze Classic Ink (#111833, pg178), Not Quite Navy Classic Ink (#103008 , pg179)
Ribbon: Baja Breeze Seam Binding Ribbon (#122331, pg 195)

Accessories: Frost White Shimmer Paint (#116854, pg 203), Pewter Stampin Emboss Powder (#124114, pg 31 Holiday Mini)

Thursday, September 15, 2011

Day of Gratitude Notecard Gift Set Part 2


Here's the card design that I used for the notecard gift set that I posted yesterday. It is made with the “Day of Gratitude” Stamp Set. The color combo is More Mustard, Cherry Cobbler, Soft Suede, Always Artichoke and Natural Ivory. Today I will explain how colored the image, really I just made my own stamp pad.

I may do this differently than others but this is what I have found worked for me. To make your own stamp pad - You will need reinkers, white felt, and a box (I use an empty Stamp Case – the ones for wood stamps).

1. Cut the felt to fit into the bottom of the case.

2. Take your reinkers and randomly drop drops around the felt with the different colors. Less drops for the darker colors…more of the lighter colors. (I used Cherry Cobbler, Always Artichoke, More Mustard) You are finished when you have an ink spot that will cover your image. See image below. I know not a very good picture, sorry.


3. Test stamping the image on scrap paper and make sure it has the desire color…you may need to add a few more drops of the lighter ink to lighten it up.

4. When you have your color correct. Stamp away. I stamped onto Naturals Ivory Cardstock.

Here is where I stamped a few..I mean a stack of images. I made two gift bags…I am not sure if I will use them for teachers gifts or hostess gifts. I also stamped with some other images for cards…come back on Saturday for the other cards.

To finish the card - I just cut out the stamped image, sponged with Soft Suede Ink and sprayed with Homemade Shimmer Mist - Champagne Mist. I used a flower punched from the Boho Blossoms Punch. Stamped my sentiment with Cherry Cobbler Ink and punched out using the word window punch. Attached it all with a brad and I used Stampin’ Dimensionals to attach the image to the card - (The card is a 3" x 6" scored in half).

I wrapped the Soft Suede 3/8” Taffeta Ribbon around the card front, after I sponged the edges of the card.

*I shout out to my local customers – If you love this little Notecard Gift Set, it could be my gift to you if you host a workshop with me in the month of September or October. You should book now before my calendar fills.

Thanks for looking,
Karen

Stamps: Gratitude Stamp Set (#122222, pg 28)

Punches/Dies: Word Window Punch (#119857, pg 209), Boho Blossoms Punch (#119858, pg 210)

Ink: Cherry Cobbler Classic Ink Pad (#119669 pg 179), Cherry Cobbler Classic Ink Refill (#119788, pg 179), More Mustard Classic Ink Refill (#101962, pg 179), Always Artichoke Classic Ink Refill (#105232, pg 179), Soft Suede Classic Ink Pad (#1115657, pg 180)

Paper: More Mustard (#100946, pg 179), Naturals Ivory (#101849, pg 181)

Embellishments: Soft Suede 3/8” Taffeta Ribbon (#122967, pg 195)

Tools: Paper-Piercing Tool (#116631, pg 207)

Accessories: Champagne Mist Shimmer Paint (#116806, pg 203), White Felt

Adhesives: Stampin Dimensionals (#104430, pg 206)

Wednesday, September 14, 2011

Day of Gratitude Notecard Gift Set Part 1


Here's a notecard gift set that I made with the “Day of Gratitude” Stamp Set. The color combo is More Mustard, Cherry Cobbler, Soft Suede, Always Artichoke and Natural Ivory. Today I will explain how I made the Holder. If you come back tomorrow I will show you the cards for inside, they are pretty.

To make the bag/box, I used the Box #2 Die, Scallop Circle Bigz Dies, and Clear Circle Bigz Dies.

1. Run cardstock through the big shot with the Box #2 die and cut off the top 3- flaps of the box (sides and back). Using “Sticky Strip Tape” to the bottom and side flaps to assemble the box (you want an open box).

2. Cut two Scallop Circle’s using matching cardstock (here I used Soft Suede). Trim the bottom edge of the scallop circles to the desire height for the box (I can’t remember, I just made sure you could not see the box behind the circle).

3. Cut two circles in Natural Ivory with the Clear Circle Die. Randomly stamp the leaves and acorn onto the circles using Cherry Cobbler, Soft Suede, Always Artichoke and More Mustard Classic Ink.

4. Run the stamped circles through the big shot with the Square Lattice Embossing Folder. Lightly sponge the top and edges with soft suede ink (Just to give it that vintage look).

5. Trim the circles so they will fit onto the two scallop circles. Attach the ribbon to the embossed stamped circles. Attach the circles to the scallop circles. Use the paper-piercing tool to punch holes into each scallop. Attach any embellishments to the front.

6. Here is where I used a retired product “Jumbo Eyelets”, I know I don’t like using retired products but I like to use the eyelets for attaching the ribbon to paper. (So I will use them until I don’t have them…I can’t believe these are retired). Anyway if you have any you will want to punch a hole on each side of the box, using the Crop-a-Dile and attach a jumbo eyelet. If you don’t have any jumbo eyelets you can use a brad to attach the ribbon to the side or punch a hole in the side and put your ribbon through the hole.

7. Attach the completed scallop circles to the front and back of the box. Your box/bag is complete.

Come back tomorrow to see the pretty notecards I used to fill the box/bag.

Thanks for looking,
Karen

Stamps: Gratitude Stamp Set (#122222, pg 28)

Punches/Dies: Box #2 Bigz Xl Die (#114518, pg 221), Scallop Circle Bigz Dies (#113468, pg 222), Extra-Large Oval Punch (#119859, 212), Clear Circle Bigz Dies (#114533, pg 223), Lots of Tags Sizzlits Die – Label 4 (#114508, pg 224), Square Lattice Embossing Folder (#119976, pg 218),

Ink: Cherry Cobbler Classic (#119669 pg 179), More Mustard Classic Ink (#103162, pg 179), Always Artichoke Classic Ink (#105219, pg 179), Soft Suede Classic Ink (#1115657, pg 180)

Embellishments: Always Artichoke 3/8" Denim Jean Ribbon (#125054, pg 195), Soft Suede 3/8” Taffeta Ribbon (#122967, pg 195),  Jumbo Eyelets - retired

Tools: Paper-Piercing Tool (#116631, pg 207)

Accessories: Champagne Mist Shimmer Paint (#116806, pg 203)

Adhesives: Sticky Strip (#104294, pg 206), Stampin Dimensionals (#104430, pg 206)

Homemade Shimmer Mist

Sample with No Shimmer Mist

This is just a post on how to make the Homemade Shimmer Mist, I have been getting a lot of questions about the recipe. This is not my recipe, I have seen it several years ago, when Stampin Up started selling the Shimmer Paint and I have been using it all along.

NOTE: Since Stampin' Up! has stopped selling this Shimmer Paint.  I buy mine from Amazon.


*You can use the Champagne Mist Shimmer Paint or the Frost White Shimmer Paint. But the Platinum is too thick and I have not been successful with that one.

Sample with Frost White Shimmer Mist

Sample with - Champagne Shimmer Mist

*To Make Homemade Shimmer Mist - Select your Shimmer Paint and get your bottle of rubbing alcohol. Take a clean fine mist spray bottle put some drops of shimmer paint and fill with rubbing alcohol, shake, spray onto card and let dry for a few minutes.

Tip: The key is to get as much shimmer on the card with less sprays. The alcohol can mess with the adhesive on the card. I usually like to spray my card pieces before I assemble. You can use more or less paint to get your desire look.

Have fun and I wish you lots of shimmer! :o)
Thanks,
Karen

Tuesday, September 13, 2011

Vintage Winter Post


Here's a card I made using my favorite Christmas Stamp Set, “Winter Post”. The color combo is Baja Breeze, Cherry Cobbler, Soft Suede and Natural Ivory.

First, I stamped the skaters in Cherry Cobbler Classic Ink and used my blender pen to color in the hat and sweater. I punched the image out using the 2-1/2” Circle Punch. The Merry Christmas saying is from the “Bells & Boughs” Stamp Set. The mat behind the skaters is embossed using the New “Snow Burst” - Textured Impressions Embossing Folder. The main Layer is embossed using the “Northern Flurry” Textured Impressions Embossing Folder and lightly sponged using Soft Suede Classic Ink to make the snowflakes pop. Finally, I used an Antique Brad to attach the bow to the card.  I did spray some Homemade Shimmer Mist made with the Champagne Mist Shimmer Paint onto the card.

Let me know what you think.
Thanks for looking,
Karen

Stamps: “Winter Post” (#111780, pg 31), "Bells & Boughs” stamp set (C#122552, pg 31)

Paper: Baja Breeze (#111352, pg 178), Cherry Cobbler (#119685, pg 179), Soft Suede (#102128, pg 180), Naturals Ivory (#101849, pg 181)

Punches/Dies: 2-1/2" Circle Punch (#120906, pg 212), Extra-Large Oval Punch (#119859, 212), Northern Flurry Embossing Folder (#120902, pg 219), 3” Circle Originals Dies (#122125, pg 220), Lots of Tags Sizzlits Die – Label 4 (#114508, pg 224), Snow Burst Embossing Folder (#124096, pg 33 (Holiday Mini), corner rounder

Ink: Cherry Cobbler Classic (#119669 pg 179), Soft Suede Classic Ink (#1115657, pg 180)

Embellishments: Cherry Cobbler Seam Binding Ribbon (#120992, pg 195), Antique Brads (#117273, pg 198)

Accessories: Champagne Mist Shimmer Paint (#116806, pg 203)

Monday, September 12, 2011

Medallion Christmas Wreath


Here's a card I made using the Medallion Background Stamp for my Christmas Wreath. This is such a universal stamp, I love it. The color combo is Always Artichoke, Cherry Cobbler and Natural Ivory.

First, I stamped the medallion in Always Artichoke Classics Ink. The inside of the wreath is a stamp from the "Merry & Type" stamp set, stamped in Cherry Cobbler and punched out using the 2-3/8" Scallop Circle Punch. I used the Circle Punch from the Itty Bitty Shapes Pack to make the berries in Cherry Cobbler. I sprayed my card pieces with the homemade shimmer mist (with Champagne Mist Shimmer Paint) and let dry before I attached them. The berries I covered with Dazzling Details from the holiday mini catalog, so they would stand out. Lastly I used an Antique Brad to attach the bow to the wreath…I mean card. :o)

Let me know what you think.
Thanks,
Karen

Stamps: Medallion Background Stamp (#115223, pg 149), "Merry & Type" stamp set (C#122552, pg 31)

Punches: 2-3/8" Scallop Circle Punch (#118874, pg 210), Circle Punch from the Itty Bitty Shapes
Pack (#118309, 210), corner rounder

Paper: Naturals Ivory (#101849, pg 181), Cherry Cobbler (#119685, pg 179), Always Artichoke (#105119, pg 179)

Ink: Cherry Cobbler Classic (#119669 pg 179), Always Artichoke Classic Ink (#105219, pg 179)

Ribbon: Cherry Cobbler Seam Binding Ribbon (#120992, pg 195)

Accessories: Champagne Mist Shimmer Paint (#116806, pg 203), Antique Brads (#117273, pg 198), Dazzling Details (#124117, pg 41, Holiday Mini)

Adhesives: Stampin Dimensionals (#104430, pg 206)

Update

Hello All,

Sorry I have been unable to post the past few weeks. From the earthquake, Hurricane, loss of power of 4 days and getting poison ivy, I really needed a breather. I think my family is just now getting back to the swing of things. I hope things calm down for a bit. Although with all the excitement we still feel blessed and our hearts go out to those who were less fortunate.

This weekend I have been busy with making Christmas cards, which I have to post. Before all the excitement I wanted to post some other projects. My internet connection was really slow last night, so I did not mess with it. I have a couple errands to do this morning and I plan on coming back and posting later today. My plan is to schedule posts for the next two weeks. Thanks for being so understanding.

Until later – Have a great morning!
Thanks,
Karen